Quick & Easy Mini Zipper Bag Tutorial: Perfect for Beginners!

Dive into the world of DIY with our simple guide to creating a mini zipper bag.

This tutorial is tailored for beginners, showcasing how to add a zipper and handle effortlessly.

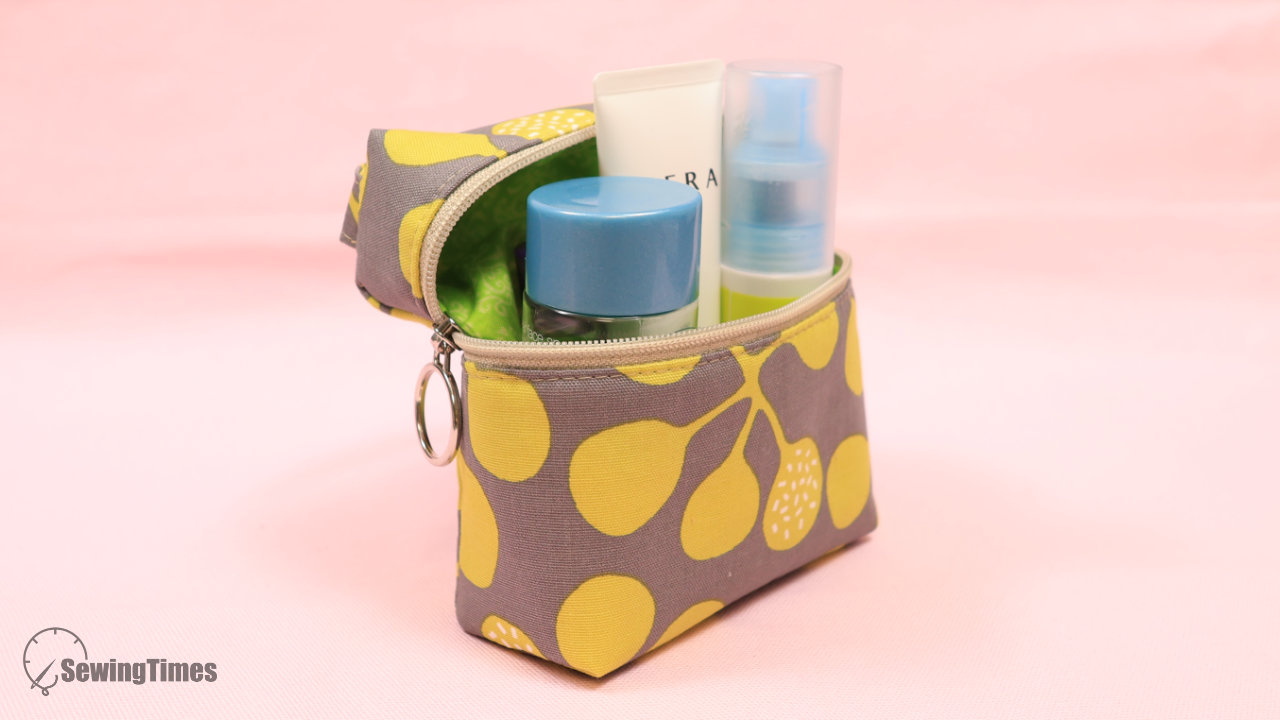
Discover the joy of making a cute, functional bag ideal for cosmetics or as a tiny purse.
With detailed steps, you'll learn to sew a small inside pocket for added organization.
Unleash your creativity and make a handy accessory that's as stylish as it is practical.

The finished measurements of this pouch are approximately
12.5㎝(5″) W × 12.5㎝(5″) H × 5㎝(2″) D.
CLICK HERE TO WATCH THE VIDEO TUTORIAL
You may watch the full video tutorial on my Youtube channel.
https://youtu.be/k-1FDqSWZ7E
Share this video with a lot of people who need it.
Let's get started!!
◎ Main Panel
① 24.5㎝ × 23㎝ (9¾″ × 9⅛″) Outer layer
① 24.5㎝ × 23㎝ (9¾″ × 9⅛″) Lining
① 22.5㎝ × 21㎝ (8⅞″ × 8¼″) Fusible fleece
① 24.5㎝ × 15㎝ (9¾″ × 6″) Outer layer
① 24.5㎝ × 15㎝ (9¾″ × 6″) Lining
① 22.5㎝ × 13㎝ (8⅞″ × 5⅛″) Fusible fleece
◎ Inside Pocket
① 14.5㎝ × 15㎝ (5¾″ × 6″) Lining
◎ Handle
① 8㎝ × 20㎝ (3¼″ × 8″) Outer layer
◎ Others
① 25㎝ (9⅞″) Zipper
② Zipper Slider


Separate the zipper.
With assembled outer layer right side up, center zipper right side facing down along top edge.
Using your zipper foot, sew along top edge using a 1㎝(3/8″) seam allowance.

Open out, press pieces away from and top stitch on both 0.3cm away from the zipper.

Fold the handle pieces in half, wrong sides together to make a crease.
Then fold each edge in toward the middle and press.
Stitch along both long edges of the strip, 0.3cm from the edge.

Place and sew the handle 5㎝(2″) upper the end of the zipper.

Insert the zipper sliders on both ends of the zipper.

Combine the seams so that a flat base is formed.
Sew with an allowance of about 1㎝(3/8″), leaving 1㎝(3/8″) on the end.


Flip the back of the pouch and align it with the bottom.

Sew both sides and bottom.

Fold the inner pocket wrong sides together in half, and sew the top edge.

Place the inner pocket on the right side of the lining and sew the 3 sides.

Fold the top of the lining in 1㎝(3/8″) and iron.

Combine the seams so that a flat base is formed.
Sew with an allowance of about 1㎝(3/8″).

Flip the back of the pouch and align it with the bottom. Sew both sides and bottom.


Put the outer layer inside the lining.
Align the pouch opening.

Attach the lining to the zipper using a blind stitch.

Turn out our cosmetic bag, and the cosmetic bag is ready!
(❁´◡`❁)
RELATED POSTS:


