How to make a Carry On Underseat Luggage

Today, I made a convenient and practical large-sized travel bag.

This Bag has a full wraparound zip opening to give easy access to the spacious main compartment.
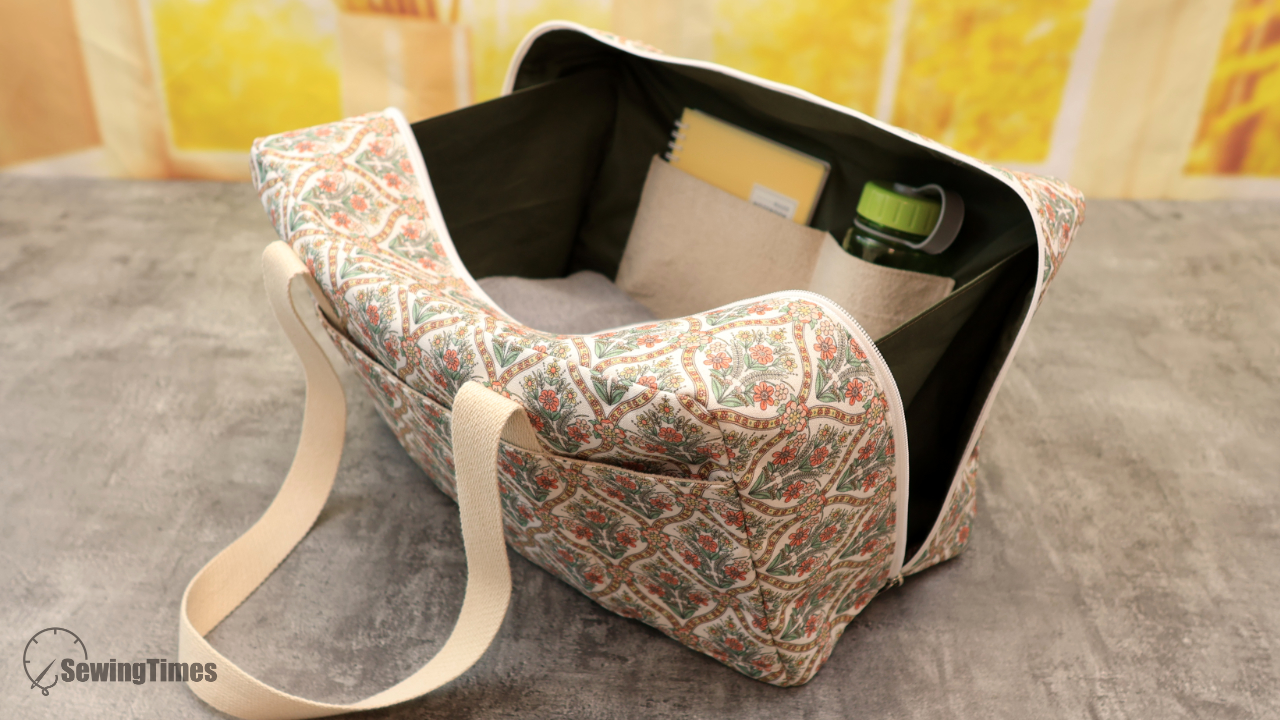
And its trolley sleeve perfectly secures to any away suitcase.

With a 15" laptop pocket, we also love it as a daily work bag or gym bag.
Let's make it with Sewingtimes.

The finished measurements of this bag are approximately 40㎝(15⅞″) W × 25㎝(9⅞″) H × 18㎝(7⅛″) D.
You may watch the full video tutorial on my Youtube channel.
Share this video with a lot of people who need it.
Let's get started!!
◎ Main Panel
① 42㎝ × 27㎝ (16⅝″ × 10¾″) Outer layer
① 42㎝ × 12.5㎝ (16⅝″ × 5″) Outer layer
① 42㎝ × 16.5㎝ (16⅝″ × 6½″) Lining
② 42㎝ × 27㎝ (16⅝″ × 10¾″) Lining
② 40㎝ × 25㎝ (15⅞″ × 9⅞″) Fusible fleece
◎ Zipper Panel
② 90㎝ × 10.5㎝ (35⅜″ × 4¼″) Outer layer
② 90㎝ × 10.5㎝ (35⅜″ × 4¼″) Lining
② 88㎝ × 8.5㎝ (34¾″ × 3⅜″) Fusible fleece
◎ Bottom Panel
① 42㎝ × 20㎝ (16⅝″ × 8″) Outer layer
① 42㎝ × 20㎝ (16⅝″ × 8″) Lining
① 40㎝ × 18㎝ (15⅞″ × 7⅛″) Fusible fleece
◎ Outside Pocket
① 42㎝ × 18.5㎝ (16⅝″ × 7½″) Outer layer
① 42㎝ × 18.5㎝ (16⅝″ × 7½″) Lining
① 40㎝ × 16.5㎝ (15⅞″ × 6½″) Mid-weight woven fusible interfacing
◎ Trolley Sleeve Panel
① 42㎝ × 18.5㎝ (16⅝″ × 7½″) Outer layer
① 42㎝ × 18.5㎝ (16⅝″ × 7½″) Lining
① 40㎝ × 16.5㎝ (15⅞″ × 6½″) Mid-weight woven fusible interfacing
◎ Inside Pocket
① 42㎝ × 37㎝ (16⅝″ × 14⅝″) Lining
① 40㎝ × 17.5㎝ (15⅞″ × 6⅞″) Mid-weight woven fusible interfacing
① 32㎝ × 32㎝ (12⅝″ × 12⅝″) Lining
① 30㎝ × 15㎝ (11⅞″ × 6″) Mid-weight woven fusible interfacing
◎ Side Panel
② 32㎝ × 42㎝ (12⅝″ × 16⅝″) Lining
◎ Others
① 88㎝ (34¾″) Zipper
② Zipper Head
① 3㎝(1¼″) wide Webbing Strap 240㎝(95″)
① 4㎝(1⅝″) wide bias tape 140㎝(55⅜″)


Place the right sides together of the front fabrics and sew with an allowance of about 1㎝.


The pattern for making this can be drawn by yourself by watching my YouTube video.

Place and sew the handles 14cm interval.

Place the right sides together of the outer and lining of the pockets.
Sew only the top part of the front pocket, and sew the top and bottom part of the back pocket.

Align the bottom of the front pocket with the front plate and sew.
🍒🍒🍒

Place the Trolley Sleeve Panel 7cm below the top of the back panel.
Sew leaving about 20cm on the middle.

Fold the inner laptop pocket in half and stitch on the top.
Fold Trolley Sleeve Panel in half and sew on three sides, leaving an opening.


Place the inner pocket on the right side of the lining and sew.

Separate the zipper.
With assembled lining right side up, center zipper right side facing up along top edge. Place the outer layer, right side down on top. Pin in place. Using your zipper foot, sew along top edge using a 1cm seam allowance.

Open out, press pieces away from and top stitch on both 0.2cm away from the zipper.


Sew to align the centers of the main panel and zipper panel.
🍒🍒🍒


Place the lining, right side down on top and sew.

Turn right side out.

Place the wrong sides together of the outer and lining of the bottom panel and sew.


Place the bottom panel between the front and back panel and sew.


Gather the sides of the main panel and fasten the zipper head.
🍒🍒🍒

Sew the sides of the bottom panel and the main panel together.


Place the bias on the bottom seam allowance and sew.


Place and whip stitch the sides.

You are finished!!

