DIY Drawstring Bag with a Front Pocket – Easy Sewing Tutorial

Are you looking for a cute and practical sewing project?
This DIY drawstring bag with a front pocket is perfect for everyday use!

The curved top of the pocket gives it a soft, elegant look, while the spacious design makes it easy to store your essentials

Whether you use it for cosmetics, stationery, or small accessories, this bag is sure to become your favorite go-to pouch.

The finished measurements of this bag are approximately
20㎝(8″) W × 21㎝(8¼″) H × 5㎝(2″) D.
You may watch the full video tutorial on my Youtube channel.
https://youtu.be/scxN70cn3TU
Share this video with a lot of people who need it.
Let's get started!!
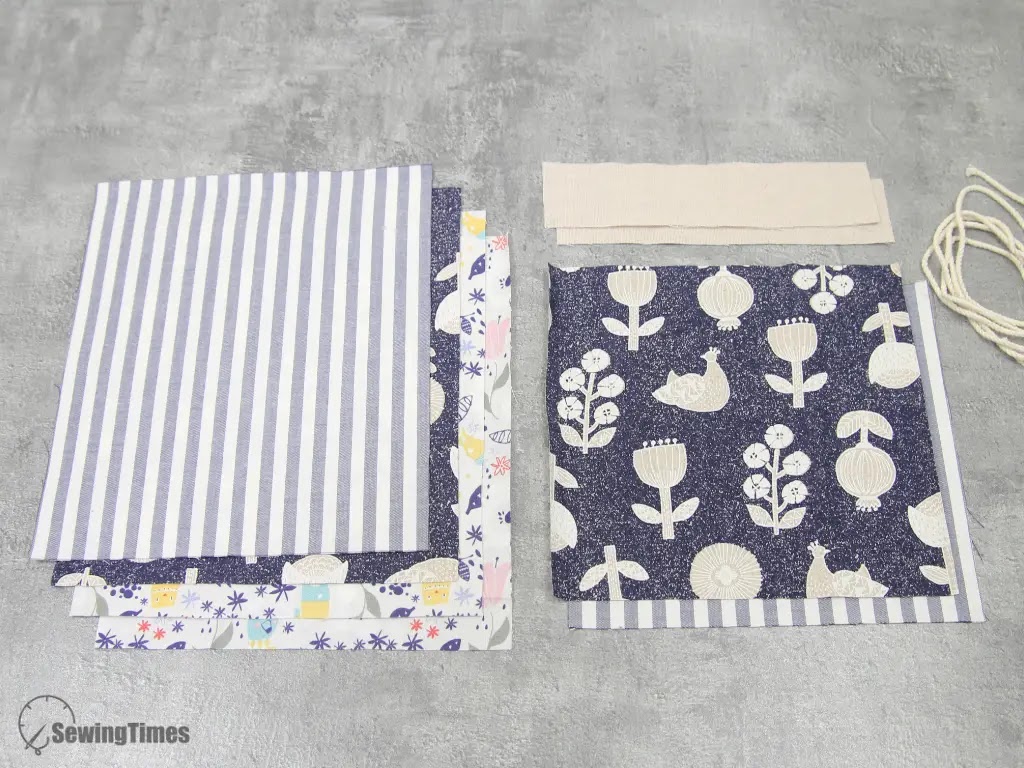
◆ Main Panel
① 22㎝ × 25.5㎝ (8¾″ × 10⅛″) Outer layer
① 22㎝ × 25.5㎝ (8¾″ × 10⅛″) Contrast Color Fabric
② 22㎝ × 25.5㎝ (8¾″ × 10⅛″) Lining
◆ Front Pocket
① 22㎝ × 20.5㎝ (8¾″ × 8⅛″) Outer layer
① 22㎝ × 20.5㎝ (8¾″ × 8⅛″) Contrast Color Fabric
① 20㎝ × 18.5㎝ (8″ × 7½″) Mid-weight woven fusible interfacing
◆ Casing
② 21㎝ × 5㎝ (8¼″ × 2″) Outer layer
◆ Others
① Drawstring Cord 150㎝(59¼″)


Cut the main panel and front pocket into the shape of the pattern.

Place the right sides together of the outer and lining of the front pocket and sew the top with an allowance of about 1㎝(3/8″).

Open out, press pieces away from and top stitch on 3㎜ (1/8″) away from the top.

Place the front pocket on the right side of the outer layer of the main panel and sew.

Fold twice the short edge of the casing 5㎜ (3/16″) in, press.
Topstitch along both short sides.

Fold in half and press.
Place the casing on the right side of the outer layer of the main panel and sew.

Place the right sides together of the outer and lining of the main panel and sew the top with an allowance of about 1㎝(3/8″).
Open out, press pieces.
Flip the layers so the outer bag pieces are right sides together, and the lining pieces are right sides together.
Sew the all edges with an allowance of about 1㎝(3/8″), leaving an opening.
Combine the seams so that a flat base is formed.
Sew with an allowance of about 1㎝(3/8″).
Turn it right side out by pulling the fabric through the opening.
And sew up this opening.

Arrange the lining inside and press pieces away from and topstitch.

Start inserting the string through one end of the casing, using a safety pin.
Continue inserting the string into the casing on the other side.
Next, take the other string and start inserting it through the casing from the opposite side. Continue as before.
Tie the ends of the string in a knot and pull the ends to close the bag.

You are finished!!!
🐳🐳🐳


