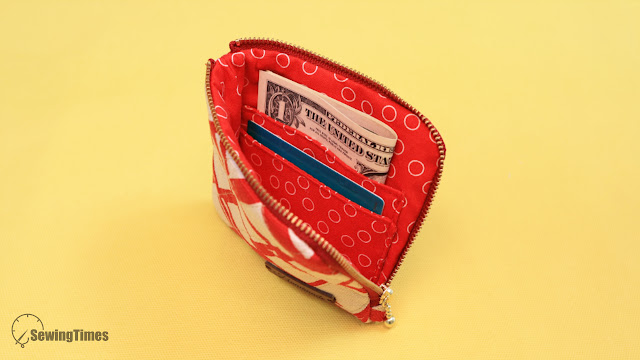
Craft Your Own Fabric Wallet: DIY Guide to a Sleek Half-Zip Card Holder
Ready to elevate your DIY game? Explore the art of fabric crafting by designing a sleek and compact half-zip wallet complete with a convenient card holder.
This tutorial is tailored for both beginners and craft enthusiasts, offering a detailed roadmap to create a small, square wallet that merges style with utility.
Unleash your creativity and follow along to produce a customized accessory that speaks volumes about your creativity.
The finished measurements of this pouch are approximately
12㎝(4¾″) W × 11.5㎝(4½″) H.
CLICK HERE TO WATCH THE VIDEO TUTORIAL
You may watch the full video tutorial on my Youtube channel.
Share this video with a lot of people who need it.
Let's get started!!
◎ Main Panel
② 14㎝ × 13.5㎝ (5⅝″ × 5⅜″) Outer layer
② 14㎝ × 13.5㎝ (5⅝″ × 5⅜″) Lining
② 12㎝ × 11.5㎝ (4¾″ × 4½″) Fusible fleece
◎ Card Pocket
② 12㎝ × 13㎝ (4¾″ × 5⅛″) Lining
① 10㎝ × 11㎝ (4″ × 4⅜″) Mid-weight woven fusible interfacing
◎ Others
① 20㎝ (8″) Zipper
① 5㎝ × 3㎝ (2″ × 1¼″) Zipper end fabric
The pattern for making this can be drawn by yourself by watching my YouTube video.
When drawing the pattern, make sure it is symmetrical.
Place the right sides together of the card pocket fabrics and
sew with an allowance of about 1cm, leaving an opening.
Clip the corners and turn it right side out by pulling the fabric through the opening.
Press, stitch the top and bottom edges.
Place the card pocket on the right side of the lining and sew.
Fold the pocket fabric and sew both ends.
Fold the zipper end fabric and place it on the end of the zipper and sew.
Place the zipper on two sides of the outer layer and pin it.
The small snips will help the zip adapt to the curved edge of the pouch and make the inserting the zip easier.
Using your zipper foot, sew with an 0.7cm seam allowance.
😍😍😍
Use the same process to sew the zipper to the other side of the wallet pieces.
Place the lining, right side down on top. Pin in place.
Using your zipper foot, sew with an 1cm seam allowance.
With sharp scissors make small snips on the curve side seams.
Sew the other lining in the same way.
Flip the layers so the outer wallet pieces are right sides together, and the lining pieces are right sides together. Sew with an allowance of about 1cm, leaving an opening.
Turn out our wallet through the hole that we left not stitched.
After this, sew up this hole, and the square wallet is ready!
(❁´◡`❁) RELATED POSTS:


