Ultimate Triple Zipper Pouch Bag: Organize in Style!

Welcome to my wonderful blog, where I'll delighted to share a fantastic tutorial on creating a triple zipper pouch bag that will transform your organization skills.

Are you tired of searching for your essentials amidst a cluttered mess? Look no further! Join us as we take you on a journey of crafting this incredible bag, featuring not one, not two, but three zippered compartments.

Get ready to embark on a creative adventure and unlock the secrets of seamless organization with our triple zipper pouch bag. Let's dive in and make your life simpler and more organized!

The finished measurements of this pouch are approximately
18㎝(7⅛″) W × 13.5㎝(5⅜″) H × 7.5㎝(3″) D.
CLICK HERE TO WATCH THE VIDEO TUTORIAL
You may watch the full video tutorial on my Youtube channel.
Let's get started!!
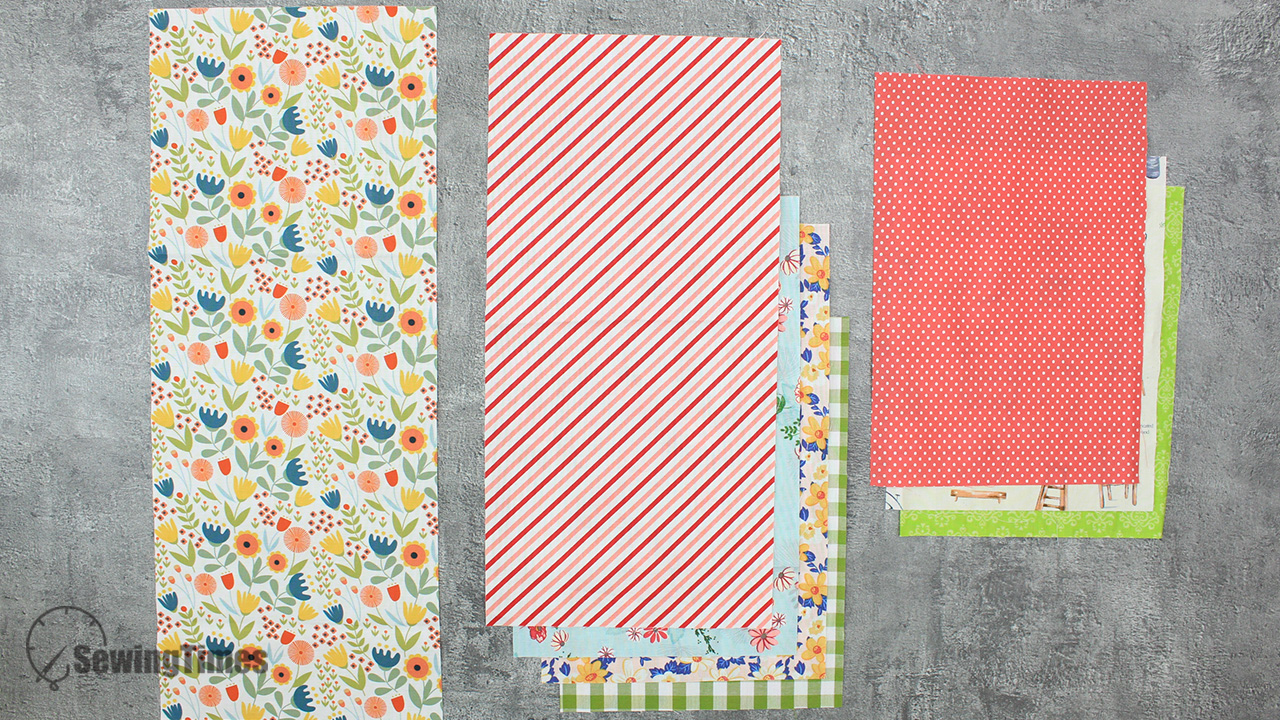
Main Fabric
① 18㎝ × 45㎝ (7⅛″ × 17¾″) Outer layer
① 18㎝ × 45㎝ (7⅛″ × 17¾″) Fusible fleece
Zipper Pocket
① 18㎝ × 37㎝ (7⅛″ × 14⅝″) Outer layer
② 18㎝ × 29㎝ (7⅛″ × 11½″) Outer layer
① 18㎝ × 25㎝ (7⅛″ × 9⅞″) Outer layer
② 18㎝ × 23㎝ (7⅛″ × 9″) Lining
① 18㎝ × 26㎝ (7⅛″ × 10¼″) Lining
① 18㎝ × 36㎝ (7⅛″ × 14⅛″) Mid-weight woven fusible interfacing
② 18㎝ × 27㎝ (7⅛″ × 10¾″) Mid-weight woven fusible interfacing
① 18㎝ × 24㎝ (7⅛″ × 9½″) Mid-weight woven fusible interfacing
Side Panel
② 30㎝ × 15㎝ (11⅞″ × 6″) Outer layer
② 30㎝ × 15㎝ (11⅞″ × 6″) Lining
② 28㎝ × 13㎝ (11⅛″ × 5⅛″) Mid-weight woven fusible interfacing
Handle
① 6㎝ × 20㎝ (2⅜″ × 8″) Outer layer
③ 15㎝ (6″) Zipper
Magnetic Buttons
4㎝(1⅝″) wide bias tape 135㎝(53⅜″)


With assembled lining(18㎝ × 23㎝) right side up, center zipper right side facing up along top edge. Place the outer layer(18㎝ × 37㎝), right side down on top. Pin in place. Using your zipper foot, sew along top edge using a 1㎝ seam allowance.

Open out, press pieces away from and top stitch on both 2~3㎜ away from the zipper.

With assembled outer layer(18㎝ × 29㎝) right side up, center zipper right side facing down along top edge.

Fold the lining you sewed earlier and place it on top of the zipper and sew it.

Open out, press pieces away from and top stitch on both 2~3㎜ away from the zipper.

This time, we prepare an outer layer of 18㎝ × 29㎝ and a lining of 18㎝ × 26㎝.


Use the same process to sew the zipper to the other side of the bag pieces.

Finally, prepare an outer fabric of 18㎝ × 25㎝ and a lining of 18㎝ × 23㎝.

Use the same process to sew the zipper to the other side of the bag pieces.


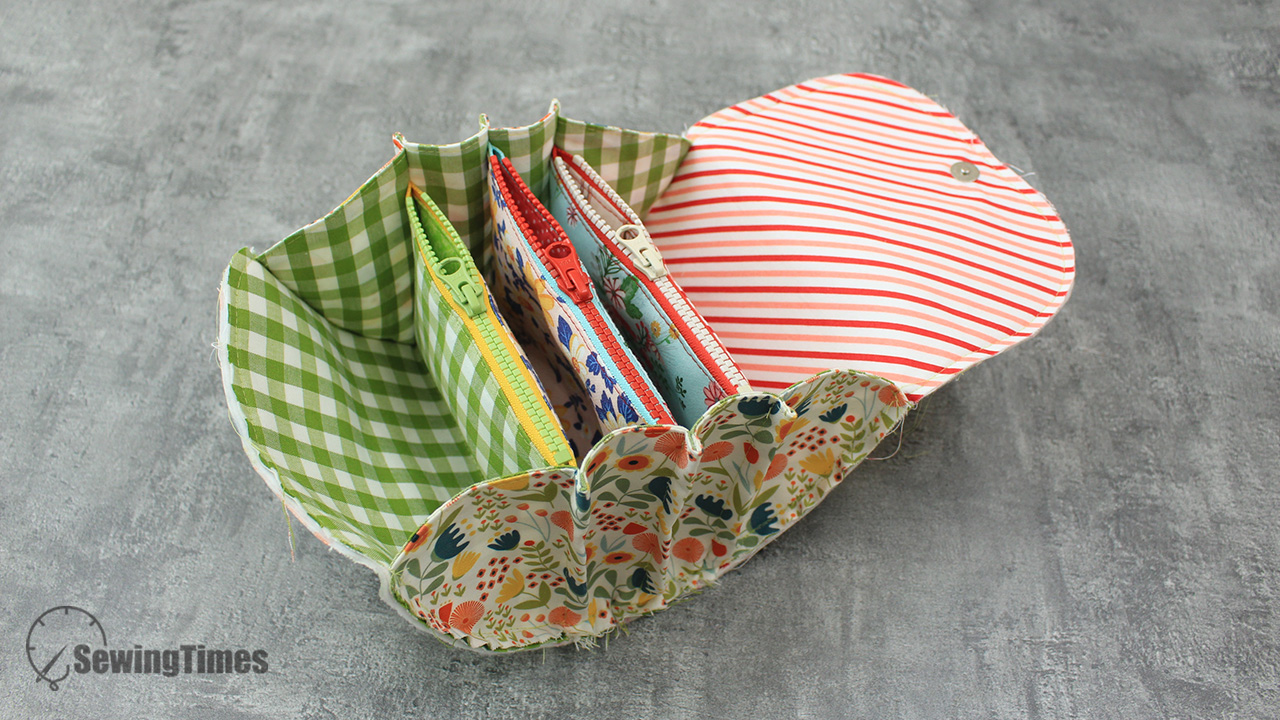
Fold 11㎝, 12.5㎝, and 11㎝ from the zipper, respectively, and sew the pocket bottom and side seams.


Place the wrong sides together of the outer and lining and sew all the way around.

Place the right sides together of the outer and lining of the side panel and sew the top with an allowance of about 1㎝.

Turn right side out and sew the top.

Stand up the zipper pocket and insert it into the side panel and sew it.
Please refer to the video for details and dimensions.

The bias tape is placed and pinned as pictured, stitch up to the end.
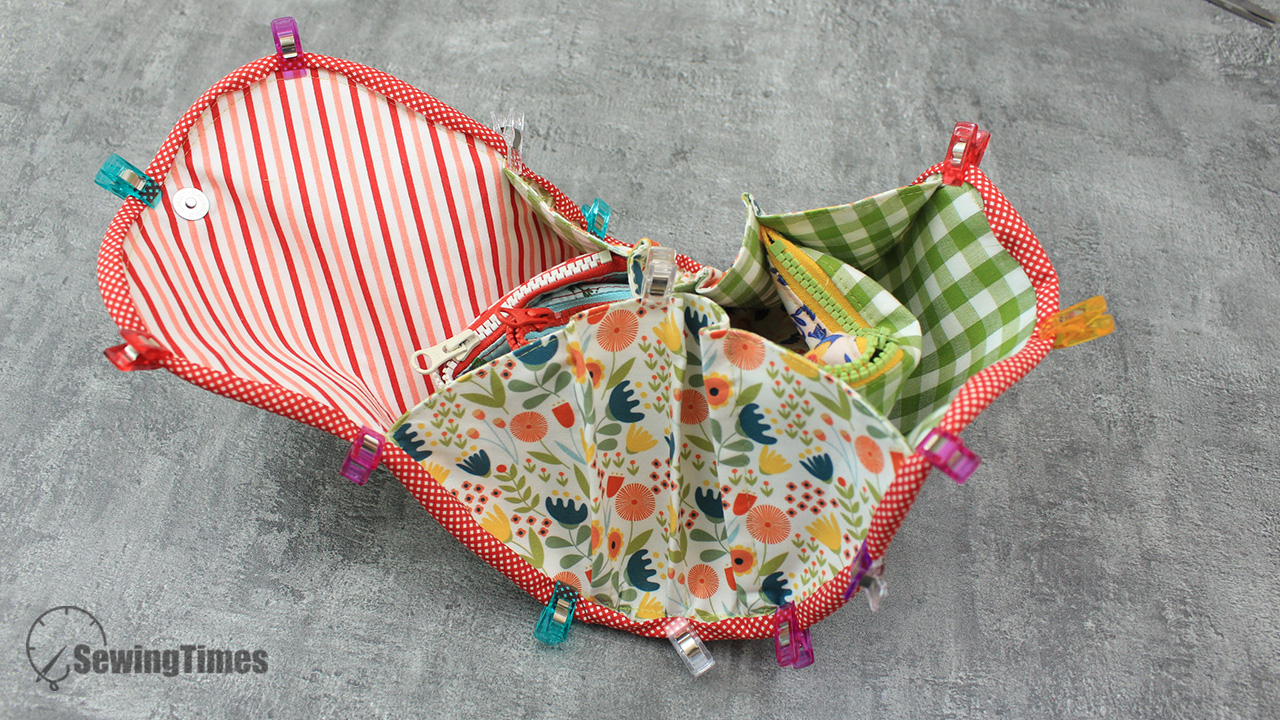
Stitch from the right side seam into seam, or sew manually from the backside.
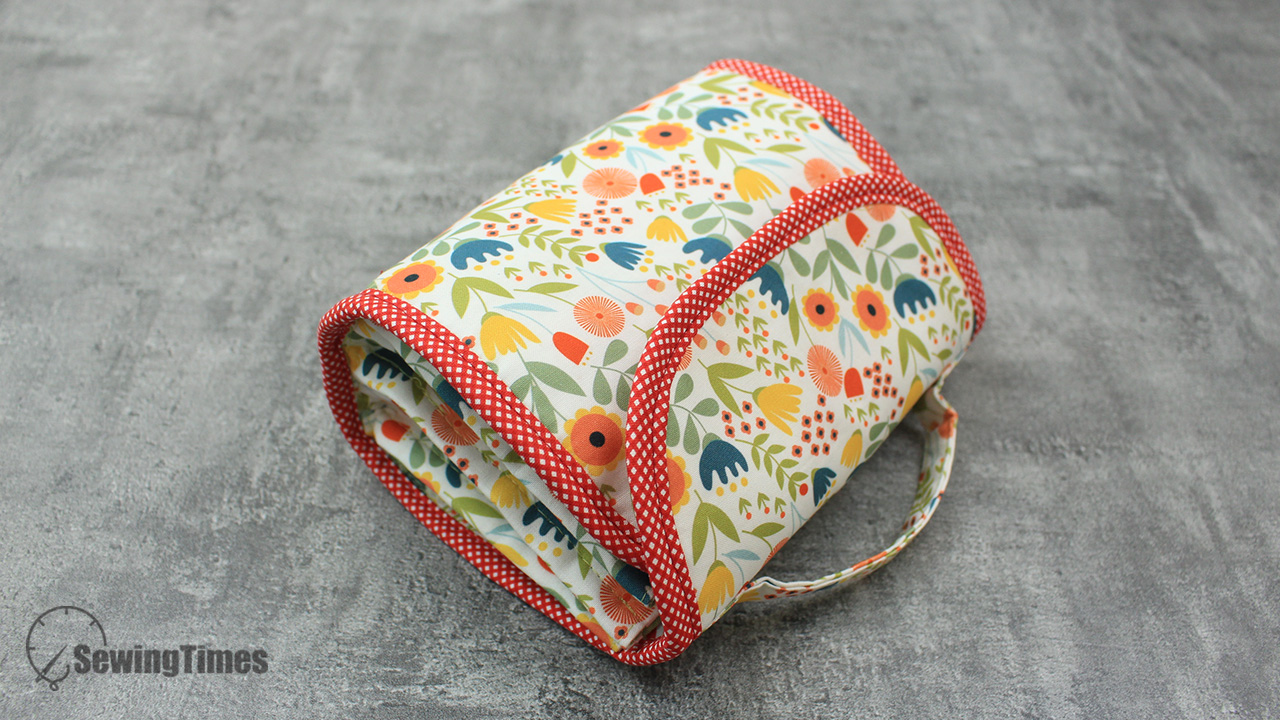
You are finished!


