How to Make a Versatile Waist Bag with Multiple Pockets
Ready to take your sewing skills to the next level?
Learn how to make a versatile waist bag with multiple pockets.
This project features a small, square bag with a curved front pocket and three in�siede pockets.
The adjustable strap allows for different wearing styles, making it a practical choice for any occasion.
Ideal for holding your essentials while on the go.
Follow our step-by-step instructions to create a functional and fashionable waist bag.
The finished measurements of this pouch are approximately
20㎝(8″) W × 11.5㎝(4½″) H × 5㎝(2″) D.
You may watch the full video tutorial on my Youtube channel.
Share this video with a lot of people who need it.
Let's get started!!
◆ Main Panel
② 22㎝ × 13.5㎝ (8¾″ × 5⅜″) Outer layer
② 22㎝ × 13.5㎝ (8¾″ × 5⅜″) Lining
② 20㎝ × 11.5㎝ (8″ × 4½″) Fusible fleece
◆ Zipper Panel
② 32㎝ × 4㎝ (12⅝″ × 1⅝″) Outer layer
② 32㎝ × 4㎝ (12⅝″ × 1⅝″) Lining
② 30㎝ × 2㎝ (11⅞″ × 3/4″) Fusible fleece
◆ Bottom Panel
① 32㎝ × 7㎝ (12⅝″ × 2¾″) Outer layer
① 32㎝ × 7㎝ (12⅝″ × 2¾″) Lining
① 30㎝ × 5㎝ (11⅞″ × 2″) Fusible fleece
◆ Flap
① 19㎝ × 16.5㎝ (7½″ × 6½″) Contrast Color Fabric
① 19㎝ × 16.5㎝ (7½″ × 6½″) Outer layer
① 19㎝ × 16.5㎝ (7½″ × 6½″) Fusible fleece
① 22㎝ × 4㎝ (8¾″ × 1⅝″) Outer layer
◆ Front Pocket
① 22㎝ × 12.5㎝ (8¾″ × 5″) Outer layer
① 22㎝ × 12.5㎝ (8¾″ × 5″) Lining
① 20㎝ × 9.75㎝ (8″ × 3⅞″) Mid-weight woven fusible interfacing
◆ Inside Pocket
② 22㎝ × 17㎝ (8¾″ × 6¾″) Lining
② 20㎝ × 7.5㎝ (8″ × 3″) Mid-weight woven fusible interfacing
◆ Others
① 30㎝ (11⅞″) Zipper
① Magnetic Buttons
① 3㎝ (1¼″) Wide Webbing Strap 120㎝ (47½″)
① 3㎝ (1¼″) Wide Triglides Slide
① 3㎝ (1¼″) Wide Side Release Buckle
① 4㎝ (1⅝″) Wide bias tape 50㎝ (19¾″)
① 4㎝ (1⅝″) Wide bias tape 150㎝ (59¼″)
① 5㎝ × 5㎝ (2″ × 2″) Mid-weight woven fusible interfacing
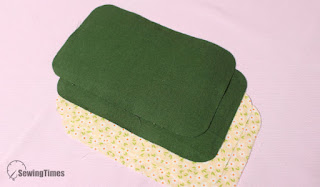
Place the right sides together of the outer and lining of the front pocket and sew curved seam with an allowance of about 1㎝(3/8″).
Open out, press pieces away from and top stitch on 0.2cm(1/8”) away from the top.
Place the �front pocket on the right side of the main panel and sew.
Place the wrong sides together of the outer and lining of the flap and sew all the edges.
Pin the bias tape to the details.
The bias tape is placed and pinned as pictured, stitch up to the end.
Stitch from the right side seam into seam, or sew manually from the backside.
Fold the bias twice, cover the seam allowance, and sew.
Place the �flap on the right side of the main panel and sew.
�Fold the inner pocket fabric and stitch the top.
Place the inner pocket on the right side of the lining and sew.
Place the wrong sides together of the outer and lining of the main panel and sew all the edges.
Place the bag straps on both sides of the back of the main fabric and sew.
With assembled lining right side up, center zipper right side facing up along top edge.
Place the outer layer, right side down on top. Pin in place.
Using your zipper foot, sew along top edge using a 1㎝(3/8″) seam allowance.
Open out, press pieces away from the zipper.
Attach the outer and lining to the other side of the zip the same way.
Open out, press pieces away from and top stitch on both 0.2cm(1/8”) away from the zipper.
Place the zipper panel between the lining and outer fabric of the gusset panel and sew on both sides.
Do this by marking the quarter of your �main panel and the quarter of your side panel.
Now, using your quarter marks, start pining the bottom of your side panel around the perimeter of your bottom.
Sew all the edges with an allowance of about 1㎝(3/8″).
Fold the bias twice, cover the seam allowance, and sew.
You are finished!!!
🍒🍒🍒
RELATED STORIES :


