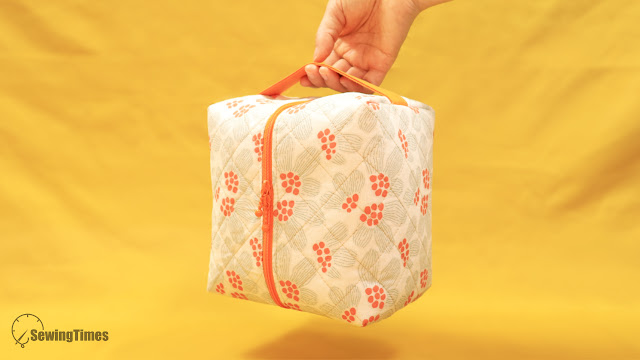
Easy Crafting a Functional Cube-Shaped Pouch: DIY Tutorial
Unlock the art of creating a versatile cube-shaped pouch perfect for travel or daily use!
Join me in this tutorial where I'll walk you through crafting a functional and lightweight zippered pouch.
With two open pockets inside for secure organization, this handmade accessory is designed to simplify your life while adding a touch of style.
The finished measurements of this pouch are approximately
17.5㎝(6⅞″) W × 17.5㎝(6⅞″) H × 12.5㎝(5″) D.
CLICK HERE TO WATCH THE VIDEO TUTORIAL
You may watch the full video tutorial on my Youtube channel.
Share this video with a lot of people who need it.
Let's get started!!
◎ Main Panel
① 32㎝ × 61㎝ (12⅝″ × 24″) Outer layer
① 32㎝ × 61㎝ (12⅝″ × 24″) Lining
① 30㎝ × 59㎝ (11⅞″ × 23⅜″) Fusible fleece
◎ Inside Pocket
② 19.5㎝ × 27㎝ (7¾″ × 10¾″) Lining
◎ Handle
① 19.5㎝ × 12㎝ (7¾″ × 4¾″) Outer layer
◎ Others
① 30㎝ (11⅞″) Zipper
① 4㎝(1⅝″) wide bias tape 60㎝(23¾″)
The pattern for making this can be drawn by yourself by watching my YouTube video.
Fold the inner pocket right sides together in half, and sew bottom sides with a seam allowance of 1cm.
Turn it right side out.
Press and stitch the top edge.
Place the inner pocket 13cm below from top of the outside lining of the pouch.
Pin and sew 3 sides leaving pocket entrance.
With assembled lining right side up, center zipper right side facing up along top edge.
Place the outer layer, right side down on top. Pin in place.
Using your zipper foot, sew along top edge using a 1cm seam allowance.
Open out, press pieces away from the zipper.
Attach the outer and lining to the other side of the zip the same way.
Open out, press pieces away from and top stitch on both 0.3cm away from the zipper.
Turn wrong side out.
Flip the layers so the outer bag pieces are right sides together, and the lining pieces are right sides together.
Sew the both sides with an allowance of about 1cm.
Fold the handle piece in half, wrong sides together to make a crease.
Then fold each edge in toward the middle and press.
Stitch along both long edges of the strip, 0.3cm from the edge.
Place the handle to one side of the outer fabric.
Combine the seams so that a flat base is formed.
Sew with an allowance of about 1cm.
Fold the bias tape in half, wrong sides together to make a crease.
Then fold each edge in toward the middle and press.
The bias tape is placed on the sides and pinned as pictured, stitch up to the end.
You are finished!!!
(●'◡'●)
RELATED POSTS:


