How to Make a Three Compartment ToteStep-by-Step Guide
Look no further than a three compartment tote!
With three separate compartments, you can easily organize your belongings and find what you need in no time.
In this article, we'll show you how to make a three compartment tote from scratch.
The finished measurements of this bag are approximately 10㎝(4″) W × 6㎝(2⅜″) H × 4㎝(1⅝″) D.
CLICK HERE TO WATCH THE VIDEO TUTORIAL
You may watch the full video tutorial on my Youtube channel.
Share this video with a lot of people who need it.
Let's get started!!
Main Fabric
② 47㎝ × 69.5㎝ (18⅝″ × 27½″) Outer layer
② 47㎝ × 69.5㎝ (18⅝″ × 27½″) Lining
Pocket
① 27㎝ × 20㎝ (10¾″ × 8″) Outer layer
① 27㎝ × 20㎝ (10¾″ × 8″) Lining
Handle
② 10㎝ × 65㎝ (4″ × 25¾″) Outer layer
Plastic snap buttons
2 Set
Place the right sides together of the pocket fabric.
Pin and sew around the edges, leaving an opening in one side.
Clip the corners and turn it right side out by pulling the fabric through the opening.
Press, pin and stitch the top edge.
Place the pocket on the right side of the main fabric and sew 3 sides.
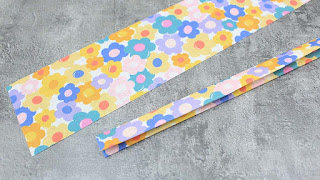
Fold the handle fabric in half, wrong sides together to make a crease.
Then fold each edge in toward the middle and press.
Stitch along both long edges of the strip, 1/8'' from the edge.
Position the handle 6" interval of the main fabric, then sew with 1/4" seam allowance.
Place the right sides together of the outer layer of the main fabric.
Sew 3 sides as shown in the picture.
Fold a piece of the main fabric.
Place the lining, right side down on top. Pin in place.
Sew along top and bottom edge using a 1cm seam allowance.
Flip the layers so the outer bag pieces are right sides together, and the lining pieces are right sides together.
Sew the both sides with an allowance of about 1cm, leaving an opening.
Combine the side seam and bottom so that a flat base is formed.
Sew with an allowance of about 1cm.
Turn out through the opening.
After this, sew up this hole.
Put the lining into the outer.
Topstitch all the way around of the top of the bag entrance.
Fold one finished bag.
Place the other lining, right side down on top. Pin in place.
Sew along top and bottom edge using a 1cm seam allowance.
Flip the layers so the outer bag pieces are right sides together, and the lining pieces are right sides together.
Sew the both sides with an allowance of about 1cm, leaving an opening.
Combine the side seam and bottom so that a flat base is formed.
Sew with an allowance of about 1cm.
Turn out through the opening.
After this, sew up this hole.
Put the lining into the outer.
Topstitch all the way around of the top of the bag entrance.
Sew extensions to the sides of the two bags.
Congratulations, you have now made a three compartment tote!
We hope this tutorial was helpful in creating your own three compartment tote.


