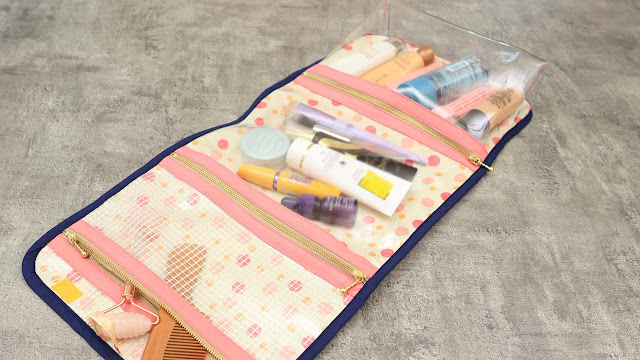
Sewing the Hanging Organizer
Learn how to sew a hanging organizer with a vinyl pocket to keep your items organized and accessible. When it comes to the Hanging Organizer, what immediately catches the eye is its practicality and versatility.
A DIY Project with a Handy Vinyl Pocket
Not only does its interior offer ample space to store a wide variety of items, but it also features a convenient vinyl pocket that allows you to keep track of your belongings at a glance. This DIY project is perfect for anyone who loves to sew and wants to create a practical storage solution.
The finished measurements of this pouch are approximately 27㎝(10¾″) W × 58.5㎝(23¼″) H.
You may watch the full video tutorial on my Youtube channel.
Share this video with a lot of people who need it.
Let's get started!!
Main Fabric
① 27㎝ × 58.5㎝ (10¾″ × 23¼″) Outer layer
① 27㎝ × 58.5㎝ (10¾″ × 23¼″) Lining
Inside Pocket
① 27㎝ × 5㎝ (10¾″ × 2″) Vinyl Fabric
① 27㎝ × 12㎝ (10¾″ × 4¾″) Vinyl Fabric
① 27㎝ × 21㎝ (10¾″ × 8¼″) Vinyl Fabric
① 37㎝ × 21㎝ (14⅝″ × 8¼″) Vinyl Fabric
Zipper Cover
① 27㎝ × 18㎝ (10¾″ × 7⅛″) Outer layer
Handle
① 8㎝ × 30㎝ (3¼″ × 11⅞″) Outer layer
Hanging Strip
① 3㎝ × 12㎝ (1¼″ × 4¾″) Lining
Zipper
③ 25㎝(10″)
4㎝(1⅝″) wide bias tape 180㎝(71¼″)
Hook and Loop
The pattern for making this can be drawn by yourself by watching my YouTube video.
Attach the double sided tape on the zipper, attach the vinyl fabric on top and sew. When sewing vinyl fabric, using a roller presser foot is helpful.
Fold your zipper cover fabric piece in half with the 3㎝ sides together and press.
Place it on top of the zipper and sew two lines.
Connect the remaining pockets in the same way.
Combine the seams so that a flat base is formed.
Sew with an allowance of about 1cm.
Place the connected pocket on the lining and sew around all the edges.
Place the wrong sides together of the outer and lining and sew all the edges.
The bias tape is placed as pictured, stitch up to the end.
Fold the bias twice and place it on the outer side and sew.
We hope this tutorial has been helpful in guiding you through the process of sewing your own hanging organizer.


