Cute and Functional - Jewelry Storage Sewing Tutorial
With this easy-to-follow tutorial, you'll be able to create beautiful and practical jewelry storage pouches that will keep your accessories organized and accessible.
We'll start by introducing you to the materials and tools you'll need, including fabric, interfacing, zippers, and a sewing machine.
Then, we'll guide you through each step of the process, from measuring and cutting your materials to sewing the pieces together and adding the zipper.
The finished measurements of this pouch are approximately
13.5㎝(5⅜″) W × 10㎝(4″) H × 7㎝(2¾″) D.
DIY Jewerly Box Pouch
#sewingtimes
😊😊😊
CLICK HERE TO WATCH THE VIDEO TUTORIAL
You may watch the full video tutorial on my Youtube channel.
Share this video with a lot of people who need it.
Let's get started!!
Top Fabric
1 15.5㎝ × 12㎝ (6¼″ × 4¾″) Outer layer
1 15.5㎝ × 5㎝ (6¼″ × 2″) Lining
1 15.5㎝ × 9㎝ (6¼″ × 3⅝″) Lining
1 13.5㎝ × 10㎝ (5⅜″ × 4″) Fusible fleece
Bottom Fabric
1 15.5㎝ × 12㎝ (6¼″ × 4¾″) Outer layer
1 15.5㎝ × 12㎝ (6¼″ × 4¾″) Lining
1 13.5㎝ × 10㎝ (5⅜″ × 4″) Fusible fleece
Back panel
1 10㎝ × 9㎝ (4″ × 3⅝″) Outer layer
1 10㎝ × 9㎝ (4″ × 3⅝″) Lining
1 8㎝ × 7㎝ (3¼″ × 2¾″) Fusible fleece
Upper of zipper panel
1 37㎝ × 4㎝ (14⅝″ × 1⅝″) Outer layer
1 37㎝ × 4㎝ (14⅝″ × 1⅝″) Lining
1 35㎝ × 2㎝ (13¾″ × 3/4″) Fusible fleece
Lower of zipper panel
1 37㎝ × 6㎝ (14⅝″ × 2⅜″) Outer layer
1 37㎝ × 6㎝ (14⅝″ × 2⅜″) Lining
1 35㎝ × 4㎝ (13¾″ ×1⅝″) Fusible fleece
Elastic Pocket
1 25㎝ × 10㎝ (9⅞″ × 4″) Lining
Drawstring Pouch
2 23.5㎝ × 12.5㎝ (9¼″ × 5″) Lining
Button Fabric
6 3.5㎝ × 5㎝ (1⅜″ × 2″) Lining
1 37㎝ (14⅝″) Zipper
1 4㎝(1⅝″) wide Bias Tape 50㎝(19¾″)
5㎜ wide Elastic 25㎝ (9⅞″)
Cotton string 100㎝ (39½″)
3 Sew-on snap buttons
Button it up first.
Sew the top and bottom of the lining face to face.
Fold half the pocket fabric.
Sew the straight edge 1cm in from top.
Insert the elastic and Pull the elsastic to make creases.
Place the pocket on the right side of the lining and sew.
Cut the four corners of the fabric round by referring to the video.
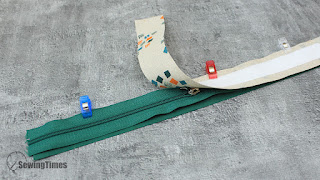
Layer an outer (Upper of zipper panel) piece face up, then the zipper face down along one edge, and then the lining face down.
Sew with an allowance of about 1cm.
Use the same process to sew the zipper to the lower of zipper panel.
Open out, press pieces away from and top stitch on both 0.2cm away from the zipper.
Align the side of the zipper panel between the outer and lining of the back panel and sew.
And sew the other side of the zipper panel and the back panel.
Sew the top and bottom of the zipper panel together with the outer fabric and lining.
Place the right sides together of the upper of zipper panel and outer of the top and sew with an allowance of about 1cm.
Place the lining and sew with an allowance of about 1cm, leaving an opening.
Turn right side out. And Sew up the opening.
Place the right sides together of the drawstring pouch fabrics and sew with an allowance of about 1cm, leaving 3cm on the top.
Fold the upper part twice and sew.
Sew the drawstring pouch to the bottom of the zipper panel.
Place the wrong sides together of the outer and lining of the bottom and sew.
Place the right sides together of the zipper panel and the bottom and sew.
The bias tape is placed on the seam, stitch up to the end.
Stitch from the right side seam into seam, or sew manually from the backside.
Start inserting the string through one end of the casing, using a safety pin.
Continue inserting the string into the casing on the other side.
Next, take the other string and start inserting it through the casing from the opposite side. Continue as before.
Tie the ends of the string in a knot and pull the ends to close the pouch.
YOU ARE FINISHED!
Love this? Click here for more Bag & Wallet sewing tutorials (❁´◡`❁)


